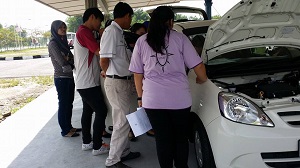
In the 1st Part of R.P.K. (Rutin Pemeriksaan Kenderaan), I stopped stopped explaining after asking candidates to put your palms on the “bonnet”.
Step 1:
With your hands placed firmly on the “Bonnet”, say: “The bonnet is in good order. No accident and can still be used”.
Step 2:
After that, you then place both your hands on the 2 front lights and indicators. Then says: “The 2 front lights and indicator are in good, working order, and can still be used”.
Step 3:
Squat down in front on the front bumper, say, “The front bumper is firm and can be used still”.
Point to the front number plate, say, “The front number plate can be read clearly, not necessary to change them”.
Following, a candidate is then asked to move to the Right hand side of the AXIA car.
Point to the Indicator Light, say, “This light in in good order, can still be used”.
Step 4:
Squat down on the right front tyre, put your palms round the tyre, saying, “The front tyre has no nails, the tyre is in good order, the pressure is sufficient”.
Step 5:
Point to the Right hand side mirror, saying, “The side mirror is in good order”.
Step 6:
Check the front window panes, switch on the ignition, manipulate the Front, Right & Left window panes up and down, then say, “The front window panes are function well”.
Then close the ignition switch.
Step 7:
Stand in the Centre between the Front and Back doors, say, “The Front and Back doors of the right hand side are in good order, no accidents, and still can be used”.
Step 8:
Finally, squat down beside the back (right) side tyre, put your hand round it, saying, “The tyre has no nails, pressure is good and tyre condition perfect”.
The Part 2 (R.P.K.) section is halted here.
In the next part of the R.P.K., I will explain about the back windscreen and the booth. The rest of the car will follow suit.

Leave A Comment